您所在的位置:首页 - Linux - 正文Linux
Nginx nginx-1.19.10 源码与腾讯云dnf 安装
 萧何-Vincent
2021-09-08
【Linux】
2115人已围观
萧何-Vincent
2021-09-08
【Linux】
2115人已围观
一、下载Nginx源文件
进入nginx官网下载nginx的稳定版本,我下载的是1.10.0。
下载:wget http://nginx.org/download/nginx-1.19.10.tar.gz 解压:tar -zxvf nginx-1.19.10.tar.gz
二、检查安装依赖项,执行下面的命令安装nginx的依赖库:
yum -y install gcc pcre pcre-devel zlib zlib-devel openssl openssl-devel
三、安装前先创建好www 用户和组
groupadd www
useradd -g www www
chsh -s /sbin/nologin www
cat /etc/passwd|grep www
四、配置Nginx安装选项
这里只配置安装到/bin目录下,直接可以使用nginx 命令启动 无需添加路径启动Nginx 进程,cd nginx安装目录,执行如下命令:
./configure --prefix=/usr/local/nginx --sbin-path=/usr/bin/nginx --with-http_ssl_module --with-http_v2_module --with-http_realip_module --with-http_addition_module --with-http_sub_module --with-http_dav_module --with-http_flv_module --with-http_mp4_module --with-http_gunzip_module --with-http_gzip_static_module --with-http_auth_request_module --with-http_random_index_module --with-http_secure_link_module --with-http_degradation_module --with-http_slice_module --with-http_stub_status_module --with-mail --with-mail_ssl_module --with-stream --with-stream_ssl_module --with-stream_realip_module --with-stream_ssl_preread_module --with-threads --user=www --group=www
五、编译并安装
make && make install
六、启动、停止、重启
# 1.启动nginx
shell> nginx
# 可通过
ps -ef | grep nginx
查看nginx是否已启动成功
# 2.停止nginx
shell> nginx -s stop
# 3. 重新启动
shell> nginx -s reload
查看Nginx 进程
ps -ef|grep nginx
查看防火墙Nginx端口是否开启
firewall-cmd --zone=public --list-ports
添加防火墙Nginx端口
firewall-cmd --zone=public --add-port=9000/tcp --permanent (--permanent永久生效,没有此参数重启后失效)
检查是否开启开机启动
chkconfig --list
chkconfig --add nginx
chkconfig nginx on
六、配置nginx开机启动
将/usr/bin/nginx命令添加到/etc/rc.d/rc.local文件中,rc.local文件会在系统启动的时候执行。但CentOS7建议将开机启动服务写成服务描述文件添加到系统服务中,所以rc.local默认没有执行权限,需要给它添加执行权限。
shell> vim /etc/rc.d/rc.local
# 添加如下参数
/usr/bin/nginx
shell> chmod +x /etc/rc.d/rc.local
扩展知识
腾讯云Centos 7.6-8.2 安装最新版Nginx 1.23.2如下:
1.执行以下命令,在 /etc/yum.repos.d/ 下创建 nginx.repo 文件。
vi /etc/yum.repos.d/nginx.repo
2.按 i 切换至编辑模式,写入以下内容。
[nginx]
name = nginx repo
baseurl = https://nginx.org/packages/mainline/centos/7/$basearch/
gpgcheck = 0
enabled = 1
3.按 Esc,输入 :wq,保存文件并返回。
4.执行以下命令,安装 nginx。
yum install -y nginx
5.执行以下命令,打开 default.conf 文件。
vim /etc/nginx/conf.d/default.conf
6.按 i 切换至编辑模式,编辑 default.conf 文件。
7.找到 server{...},并将 server 大括号中相应的配置信息替换为如下内容。用于取消对 IPv6 地址的监听,同时配置 Nginx,实现与 PHP 的联动。
(或者直接nginx 目录下新建vhosts 文件夹,nginx.conf inculde vhosts 里conf 文件 include /etc/nginx/vhosts/*.conf;)
server {
    listen       80;
    root   /usr/share/nginx/html;
    server_name  localhost;
    #charset koi8-r;
    #access_log  /var/log/nginx/log/host.access.log  main;
    #
    location / {
          index index.php index.html index.htm;
    }
    #error_page  404              /404.html;
    #redirect server error pages to the static page /50x.html
    #
    error_page   500 502 503 504  /50x.html;
    location = /50x.html {
      root   /usr/share/nginx/html;
    }
    #pass the PHP scripts to FastCGI server listening on 127.0.0.1:9000
    #
    location ~ .php$ {
      fastcgi_pass   127.0.0.1:9000;
      fastcgi_index  index.php;
      fastcgi_param  SCRIPT_FILENAME  $document_root$fastcgi_script_name;
      include        fastcgi_params;
    }
}
8.按 Esc,输入 :wq,保存文件并返回。
9.执行以下命令启动 Nginx
systemctl start nginx
10.执行以下命令,设置 Nginx 为开机自启动。
systemctl enable nginx
显示如下,则说明 Nginx 安装配置成功。

Tags: Nginx
文章评论 (暂无评论,2115人围观)
站长推荐

思科、华为、H3C命令对照表
-
小程序实战:从入门到上线,手把手教你搭建天气预报微信小程序
PHP | 2022-07-05
-

【php算法】有一母牛,到4岁可生育,每年一头,所生均是一样的母牛...问n年后有多少头牛?
PHP | 2022-07-05
-
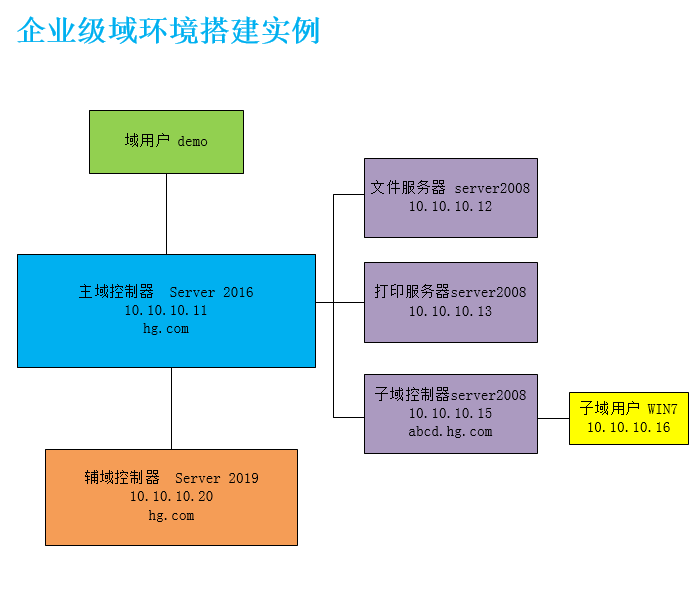
企业级域环境搭建实例——主域,辅域和子域,DNS配置实例
Network | 2022-07-01
-

MySQL + JSON = 王炸!!
DataBase | 2022-03-03
-

LVS(Linux虚拟服务)----服务器集群系统工作原理
Linux | 2022-03-01
-

元宇宙的来源是什么?涉及核心技术BIGANT
AI, Big Data | 2022-02-22
-
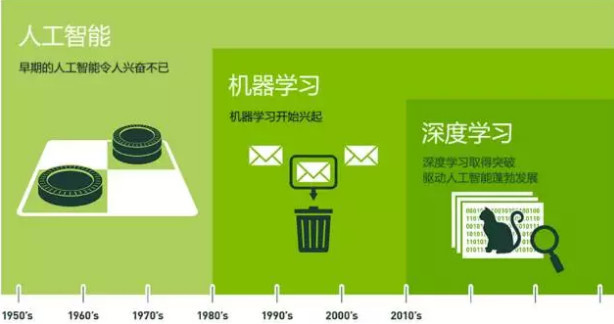
人工智能(Artificial Intelligence)、机器学习(Machine Learning)、深度学习(Deep Learning)三者区别
AI, Big Data | 2022-01-06
-
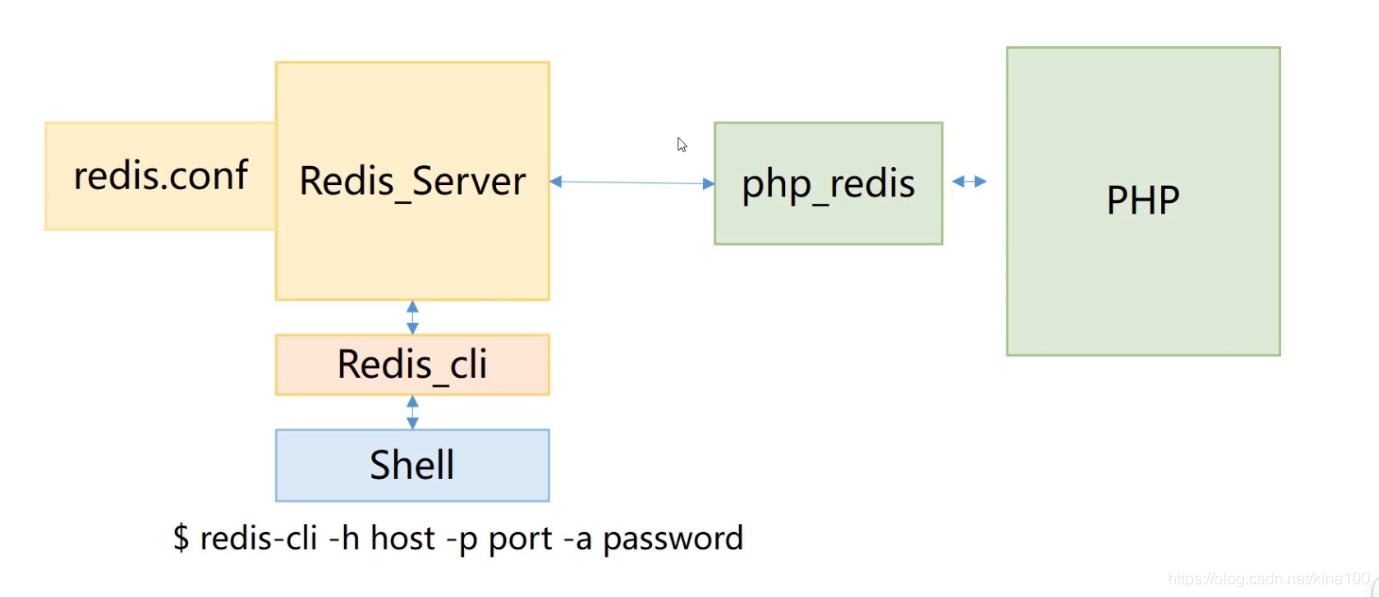
Redis 学习知识小记
DataBase | 2021-11-04
-

php面试常规问题主键索引和唯一索引有什么区别
DataBase | 2021-11-04
最新留言
-
世界末日我都挺过去了,看到楼主我才知道为什么上帝留我到现在!http://1r8.pistpyh.cn/
昵称:访客2024-07-04
-
这位作者的文笔极其出色,用词精准、贴切,能够形象地传达出他的思想和情感。http://oui.kblewwq.cn/
昵称:访客2024-07-04
-
坚持回帖!http://mqp.baishanct.com/
昵称:访客2024-07-04
-
在哪里跌倒,就在那里多爬一会儿!http://gx.baishanct.com/
昵称:访客2024-07-04
-
好东西,学习学习!http://mn7jf.xmona.com.cn/
昵称:访客2024-07-04
-
这么好的帖子,应该加精华!http://www.baishanct.com/
昵称:访客2024-07-04
-
昵称:微信用户2023-12-28
-

昵称:mm2023-12-12
-
昵称:微信用户2023-11-25
-
昵称:Tim2022-07-28
站点信息
- 文章总数:65
- 页面总数:1
- 分类总数:5
- 标签总数:12
- 评论总数:24
- 浏览总数:82970


